Lexus offers a comprehensive range of official accessories with which to personalise and upgrade your car to reflect your lifestyle. But what if the alterations you have in mind are more bespoke in nature, and that your aim is to personalise the car in terms of aesthetic rather than practical measures? May we suggest that a vinyl wrap might be the best option.
So you want to give your Lexus a makeover…
The aftermarket is full of possibilities in that respect. While we cannot recommend any action that might invalidate your vehicle’s comprehensive manufacturer warranty, many enthusiasts are opting for head-turning transformations with vinyl wraps.
Because in addition to being relatively straightforward to remove, self-adhesive vinyl is incredibly versatile. The material is produced in hundreds of different colours and can be printed with unique patterns. It can also be applied strategically or used to completely change the appearance of your car.
How to give your Lexus a vinyl wrap makeover
This feature is designed to offer Lexus owners an idea of the kind of subtle makeover that can be achieved with a vinyl wrap. It is not an exhaustive step-by-step explanation, more an overview of the basic procedures involved and the measures that professional applicators use to avoid damaging the underlying vehicle.
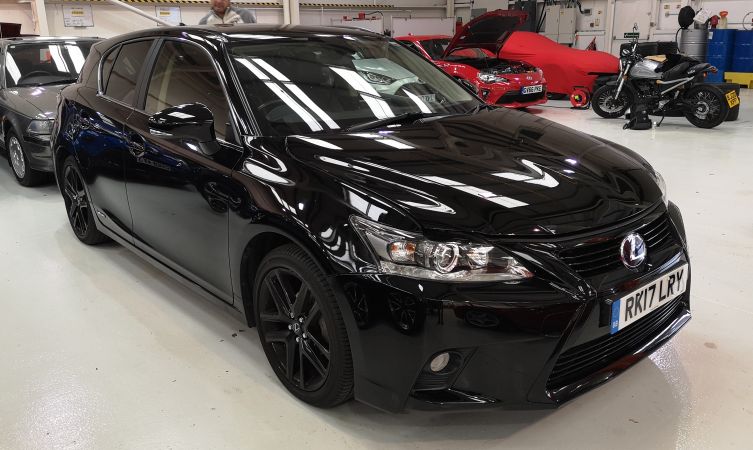
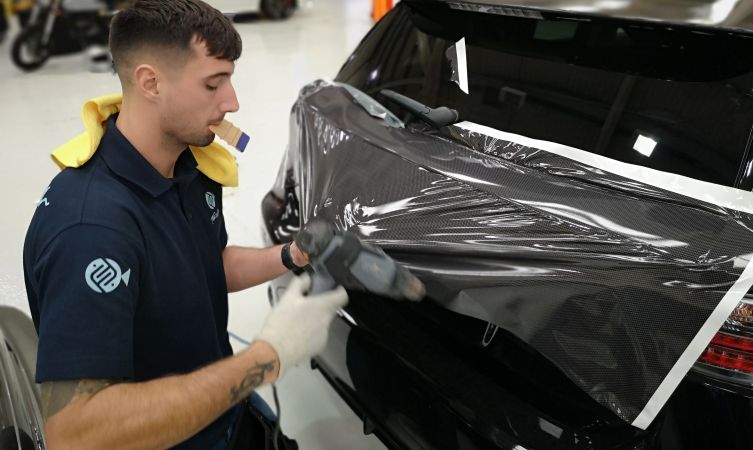
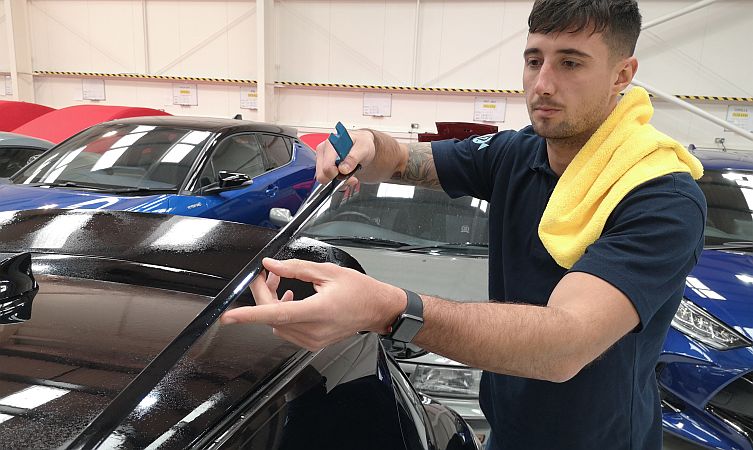
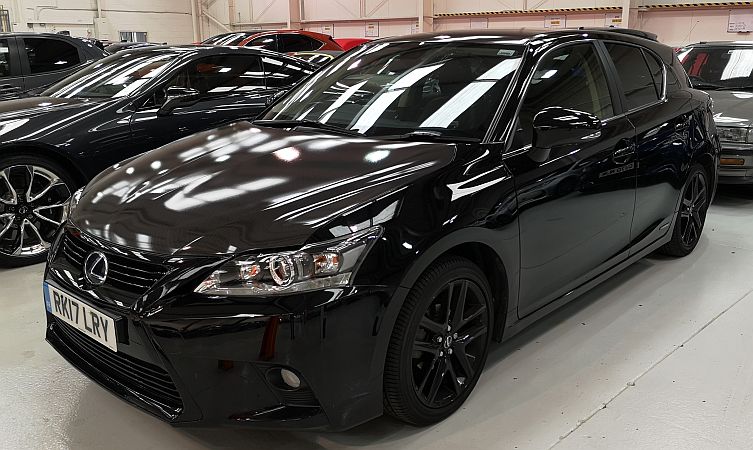
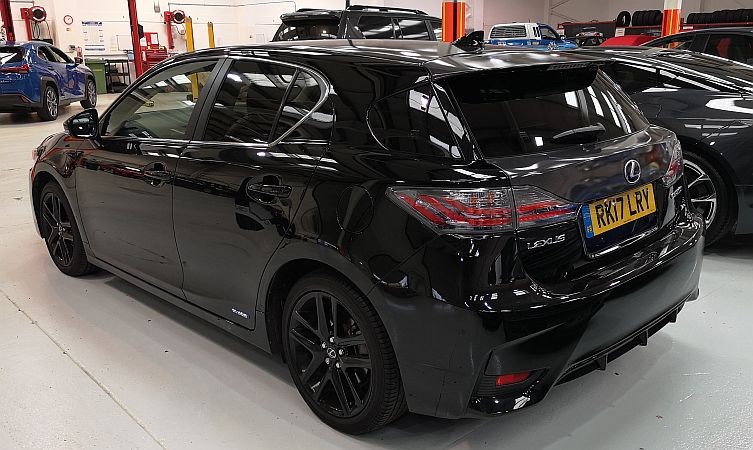
Our subject is an immaculate Lexus CT 200h Sport painted in Velvet Black. Applying the carbon fibre effect vinyl across the bonnet, roof and upper rear hatch are Mark Chamberlain and Richard Gibson from Funkeefish. Please note that it is always best to work in a clean, indoor environment and for the vehicle to have been left overnight to acclimatise to the ambient temperature.
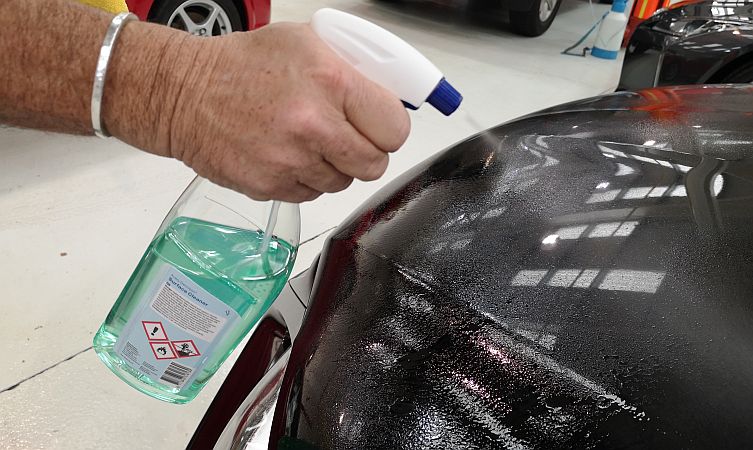
Begin by cutting the vinyl roll (in this case an Avery Dennison product) into a manageable size that offers sufficient overlap around the proposed panel. Spray the panel with a degreasing spray and thoroughly dry it off with a clean, lint-free cloth. Don’t forget to also clean under the lip of the panel as the vinyl will be tucked under this return to create a neat finished edge.
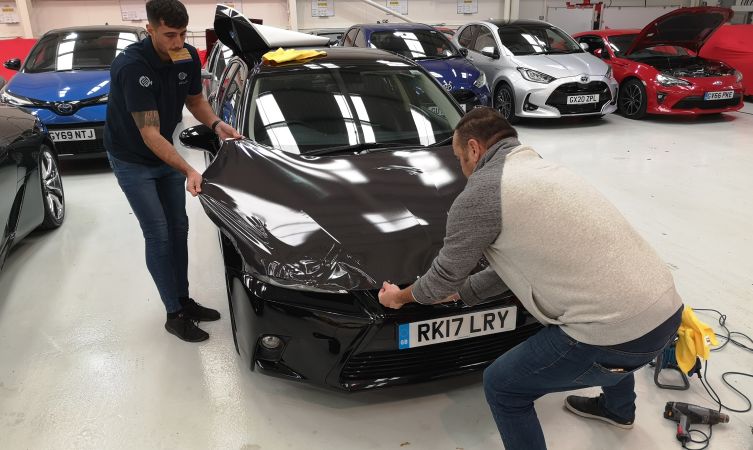
Keeping the vinyl sheet relatively taut, lower the material into position until it tacks to the surface of the panel. Gently pull on the extremities of the vinyl to help the material conform to the curvature of the surface, leaving no trapped pockets of air or obvious creases in the vinyl. The vinyl can be persuaded to conform around the tighter double curves at the leading edges of the panel by gently softening the material with a hair dryer or heat gun.
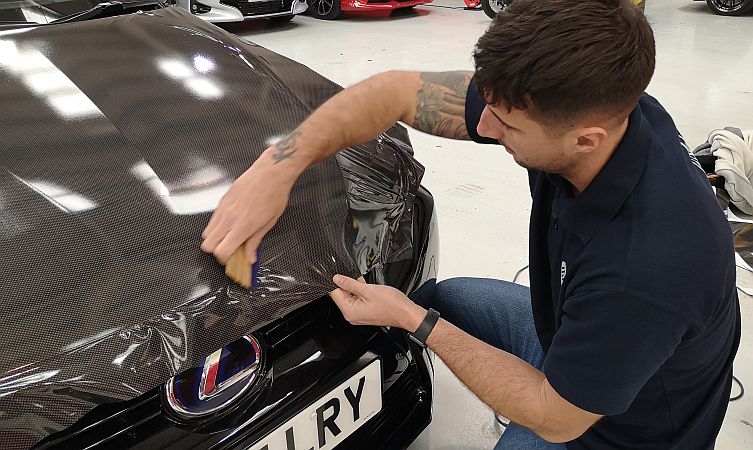
Using a felt-tipped squeegee (felt prevents the squeegee from scratching the surface), work from the centre of the panel outwards to extract air from under the vinyl and create a strong adhesive bond. High-quality wrapping vinyl assists the applicator in this process through the use of microscopically dotted adhesive that allows air to be released before it bonds into place.
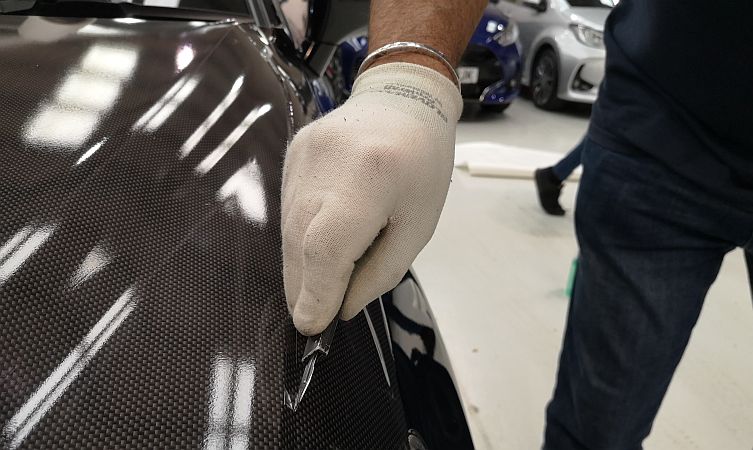
Once the vinyl has been thoroughly conformed to shape of the panel and the edges clearly defined, trim the material by running a new scalpel blade through the excess using the edge of the adjacent panel as a guide. This procedure creates enough of an overlap for the vinyl to be tucked under the return so the cut edge remains out of sight. Gently heat and firmly press down this inner edge with application gloves to ensure it is securely bonded.
Some panels feature trim pieces that need to be removed. Here, Richard has removed the CT’s gutter cover with a plastic trim tool so that the ends of the vinyl can be tucked into the recess and the cover clipped back in place for a neat, invisible finish. Thoroughly clean the panel and the recess in preparation for fitting.
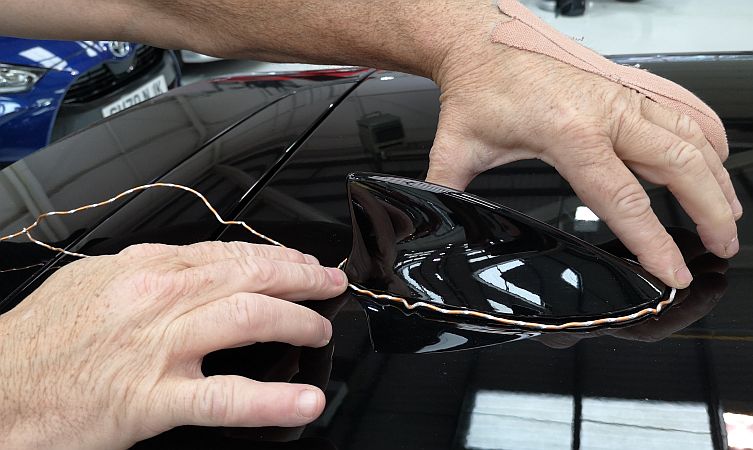
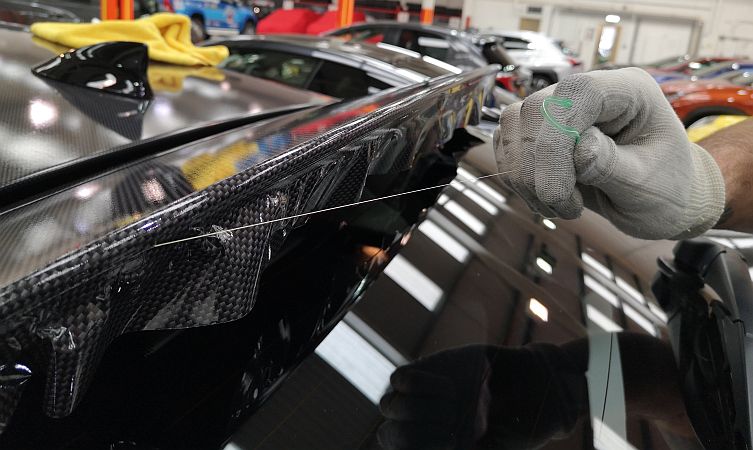
As it is not possible to easily remove the shark fin aerial from the CT, a simple template is made of its base with bendable wire. This shape is then cut out of the vinyl so the material can be floated more closely over the roof panel. Repeat the same conforming and trimming procedures used when wrapping the bonnet.
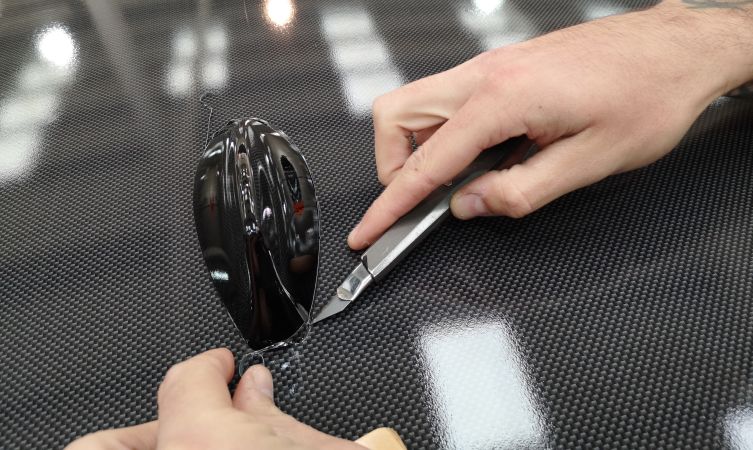
Use the squeegee to push the vinyl right up to the line where the panel and aerial meet. Insert the scalpel horizontally into the narrow gap between these two planes and trim away the excess material. Gently heat and squeegee flat this cut line all the way around the aerial. This process can also be used for components such as rubbing strips, badges and door handles.
Unless you are applying a full body wrap, it is not always necessary to wrap the underside of components such as rear hatch spoilers. In such instances it is recommended that you use knifeless tape to cut the vinyl rather than attempt to create a cut edge with a scalpel and risk scoring the paintwork. Here, Richard is applying the tape in a curve around the leading edge of the spoiler.
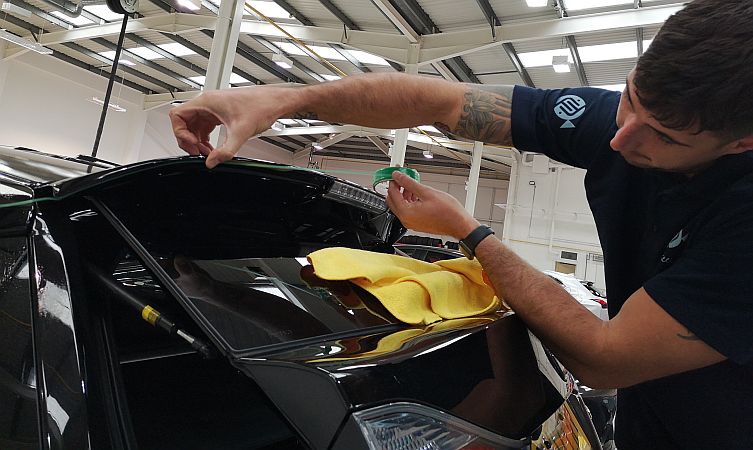
Once the roof spoiler has been wrapped, the central filament inside the knifeless tape is pulled out, leaving a perfectly cut line without any paintwork damage. Knifeless tape can also be used to create pinstripes, gaps and perfect butt seams. After all excess material is removed, gently heat and firmly press down this trailing edge with application gloves to ensure it is securely bonded.
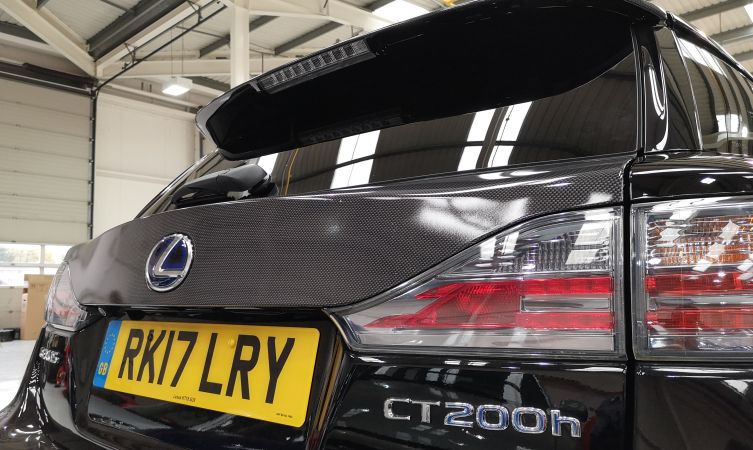
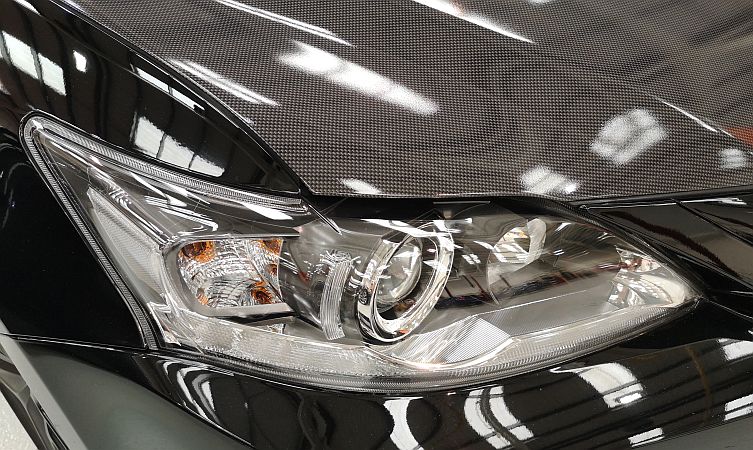
Decide beforehand where to finish the wrap, remembering that it is preferable to work with the design of the vehicle as well as the shape or construction of its panels. In this instance we chose to only wrap half of the CT’s rear hatch as we wanted to enhance the clear separation between the upper and lower sections. This decision also avoided the need to prise off the lettering.
Lexus CT vinyl wrap: the result
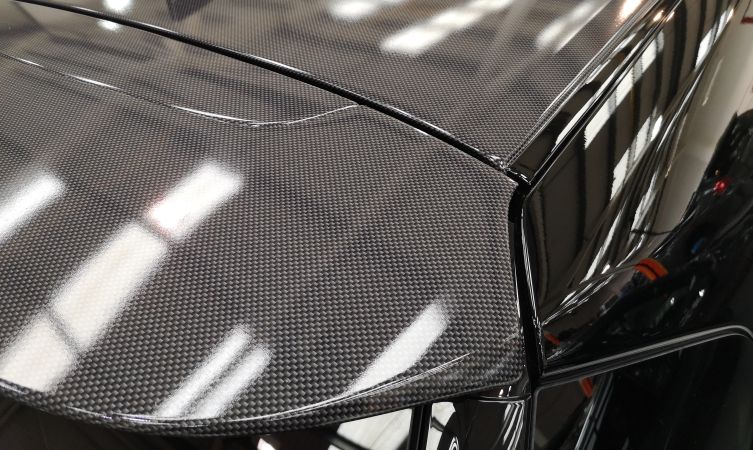
Purposefully subtle, the carbon fibre effect vinyl wrap creates an attractive distinction between the vehicle’s upper and side elevations. It’s an aesthetic Lexus has used to great effect on motorsport-inspired models such as the RC F Track Edition.
What’s more, as these horizontal panels are more likely to be the recipient of atmospheric or avian fall-out, the vinyl acts as a protective barrier for the original paintwork underneath.
What do you think of the end result? What colour or printed effect would you have applied to an all-black Lexus CT? Or has this feature got you thinking about a vinyl wrap makeover for your Lexus? Please let us know using the comment box below.
Learn more: Lexus accessories for the UX, NX, RX and RX L


hi, does Lexus UK provide vinyl wrap services with it?
as I talk to my local Lexus dealership and they had no idea
Hi Alex, thanks for your comment.
This is not a service that we offer.