From hand-carved emu eggs in Australia, to painted goose eggs in Eastern Europe, many countries celebrate springtime with their own unique egg decorations – but Japan, renowned for its takumi artisans, takes this seasonal pastime even further. Wrapped in handmade paper, its washi Easter eggs are inspired by both origami and kirigami techniques, fusing Japanese heritage with a global spring tradition.
“Quite often you see eggs covered in decorative hand-screened chiyogami paper (sometimes called yuzen) which is wonderful to work with,” says Linda Marshall, founder of Japanese paper specialist Washi Arts. “The detailed patterns lend themselves to making washi eggs, and there are hundreds of different contemporary and traditional designs.”
‘Washi’ literally means ‘Japanese paper’ (wa = Japanese and shi = paper), and this lightweight yet durable material has been crafted in Japan for the past 1,500 years. “The long plant fibres from the paper mulberry tree are used in the most common kinds, and this gives it remarkable strength,” explains David Raynor of the British Origami Society. “Weaker paper will often tear, but fine washi holds together well. Some paper artists even make their own, so they can align the fibres in just the right places to strengthen their finished design.”
But in their simplest form, making washi Easter eggs doesn’t have to be complicated – and you certainly don’t need to be an expert artisan, as our tutorial below demonstrates. Indeed, while we followed the customary methods of washi egg-decorating, we used simple origami squares with a weight of 70gsm (similar to that of photocopier paper).
Read more: Modern origami: 7 mind-boggling masterpieces
Of course, you can also go all-out with a premium takumi-style finish, using traditional washi such as katazome-shi. “These gorgeous handmade papers have been hand-stencilled too,” says Linda. “They are strong and supple, long lasting and a treat to work with. The patterns are more mingei-style than chiyogami: mingei is a traditional Japanese folk art movement.”
Read more: Kirigami: 7 amazing artworks made entirely from paper
How to make washi Easter eggs
This activity is suitable for children aged seven and older, though the cutting does require sharp scissors and an adult’s guidance, as does the optional egg-blowing.
You will need:
- 6 hens’ eggs, any sizes (but large is best); alternatively, ceramic or wooden eggs work well
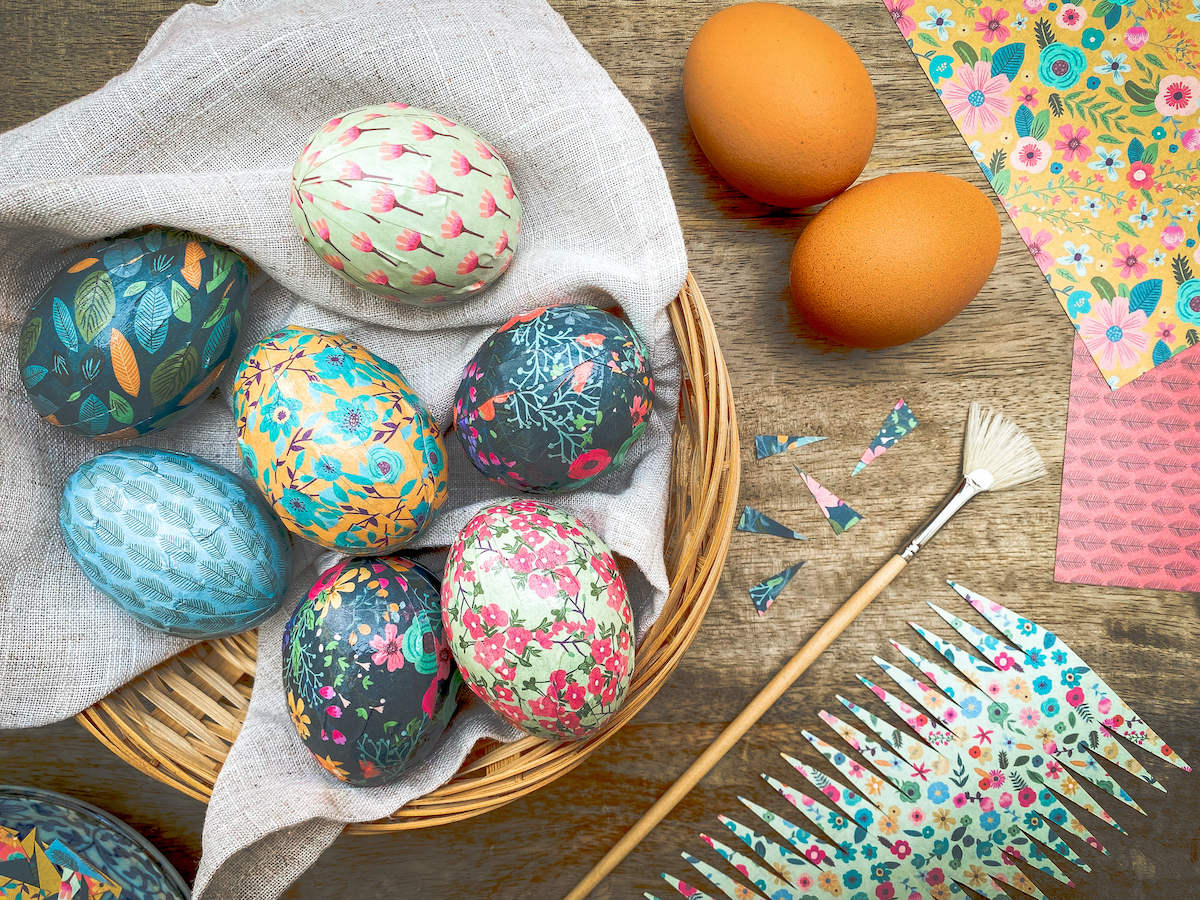
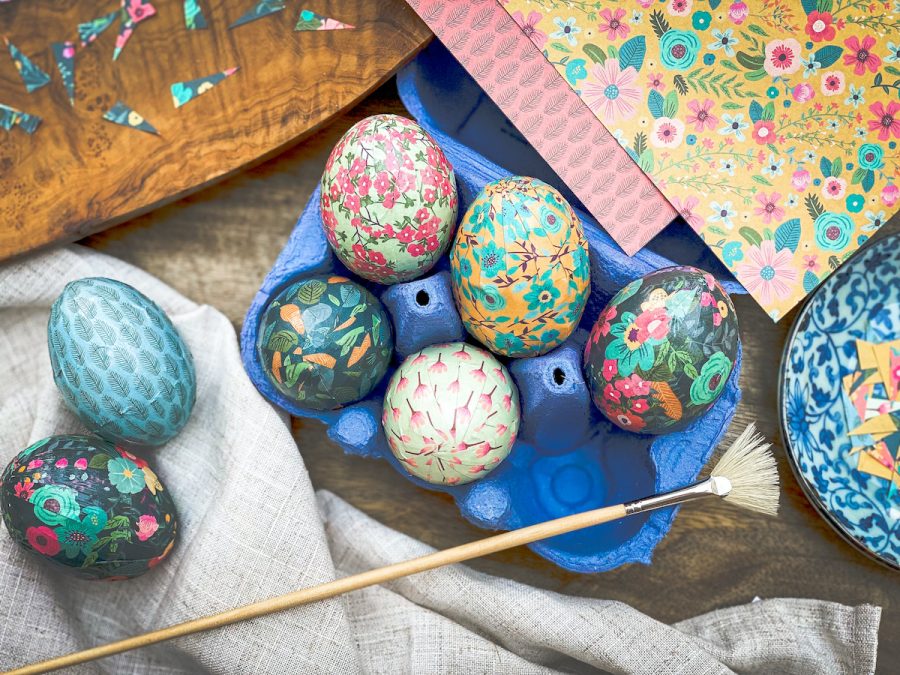
- 6 sheets of patterned washi or origami paper, measuring at least 9cm x 15cm
- Scissors
- PVA glue
- Paper varnish (or watered-down PVA glue)
- 1 small/medium art paintbrush, with soft bristles
- Ruler
- Pencil
TIP: Follow the below instructions one step at a time, rather than doing all six eggs at once. This way, you can tailor-make each piece of paper for the egg you’re working on, and finesse any fiddly techniques.
- If using hens’ eggs, you will need to blow out their contents: there are many tutorials online (and it’s much easier than it sounds). When empty, submerge the eggs in hot soapy water, allow them to fill slightly, and blow again. Leave to air-dry in a warm place for 24 hours.
- Cut the paper into a rectangle, measuring 9cm x 15cm (see photo 1). Check that the 15cm length wraps all around the ‘waist’ of the egg: you want 2-5mm of overlap. Cut away any excess paper.
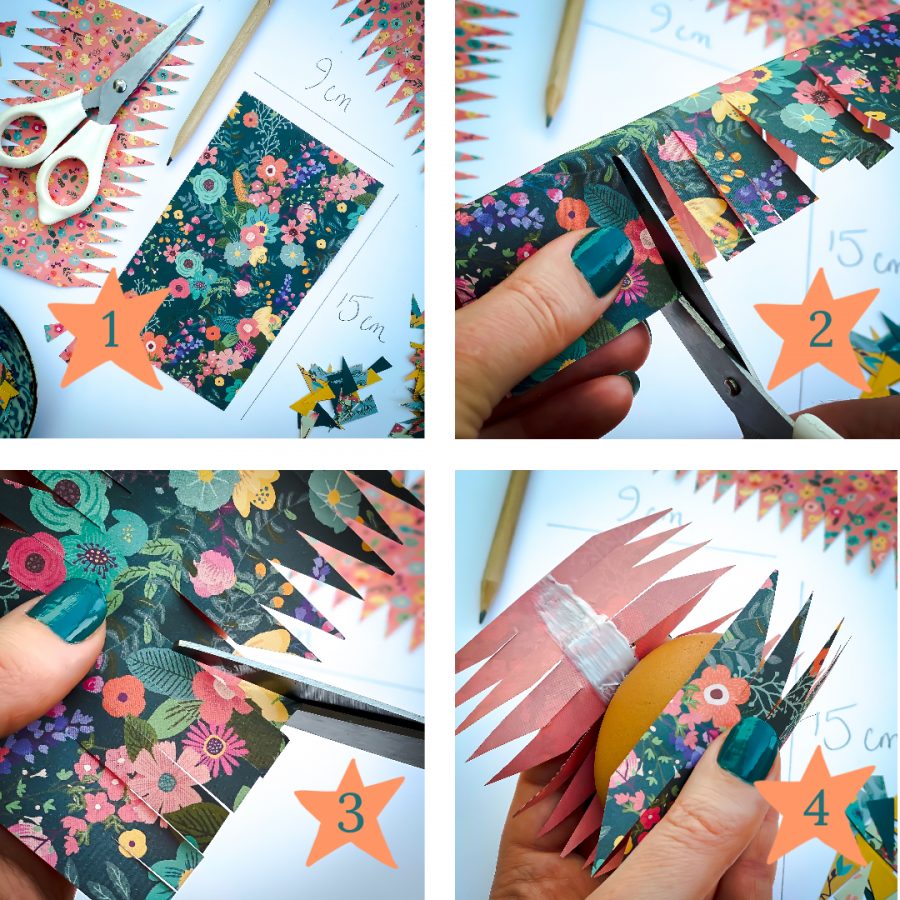
- Bend (but don’t crease) the paper in half lengthways, ensuring that the edges line up. Make a 3.5cm cut every 7mm, making sure to snip both sides of the paper equally (photo 2). Continue all along the 15cm length, making a fringe. When finished, open the paper out.
- Cut each individual fringe piece diagonally, to around 2.5cm down its length (not the full 3.5cm). Do this on both sides: each fringe piece should be identical (photo 3).
- Apply PVA glue to the ‘spine’ of the paper on its non-patterned side, and wrap it around the waist of the egg (photo 4). As you position the paper, ensure that the fringe pieces can meet at both the top and bottom of the egg. When you’re happy, smooth the glued paper around the egg (photo 5).
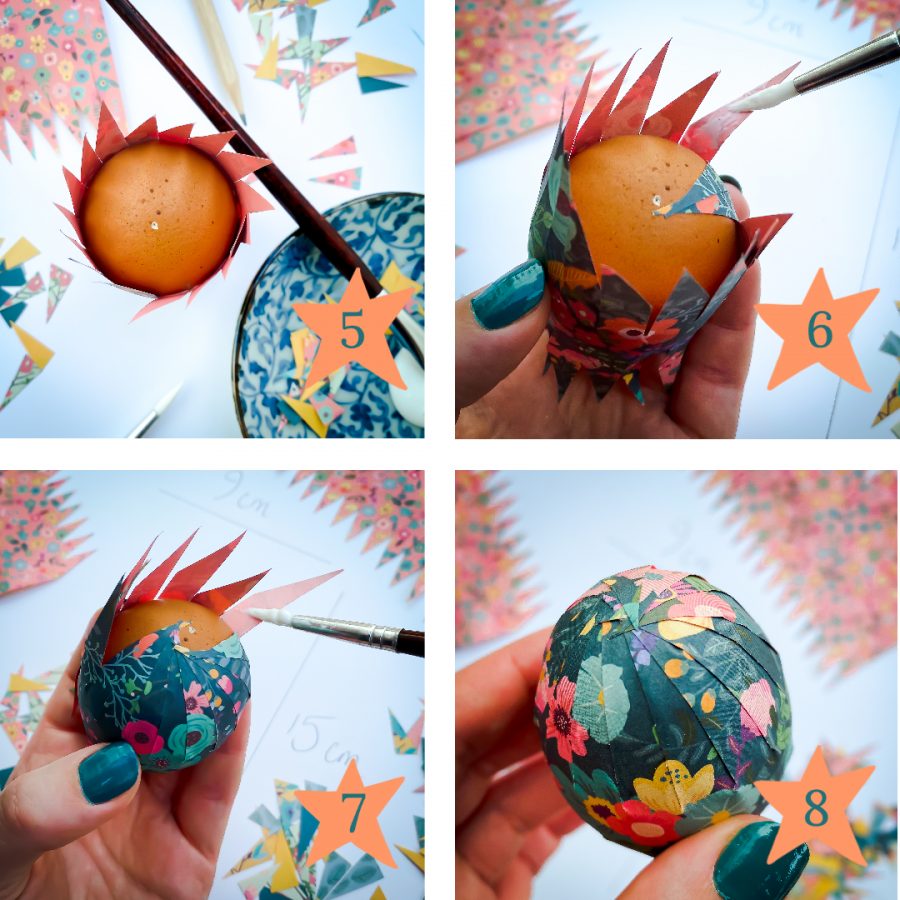
- Now it’s time to stick the fringe to the egg. Apply glue to the non-patterned side of three consecutive fringe pieces, and carefully smooth them onto the egg surface, one at a time (photo 6). Continue working around the egg, anticlockwise.
- The fringe tips should meet in the middle or slightly overlap (photo 7), but if they don’t quite join up, don’t worry: just glue a small fragment of patterned paper directly onto the bald spot, and then stick the fringe pieces on top.
- When you’ve glued one fringe, repeat steps 5 and 6 on the other side (image 8). Then, leave it to dry according to the glue instructions (usually 1-3 hours).
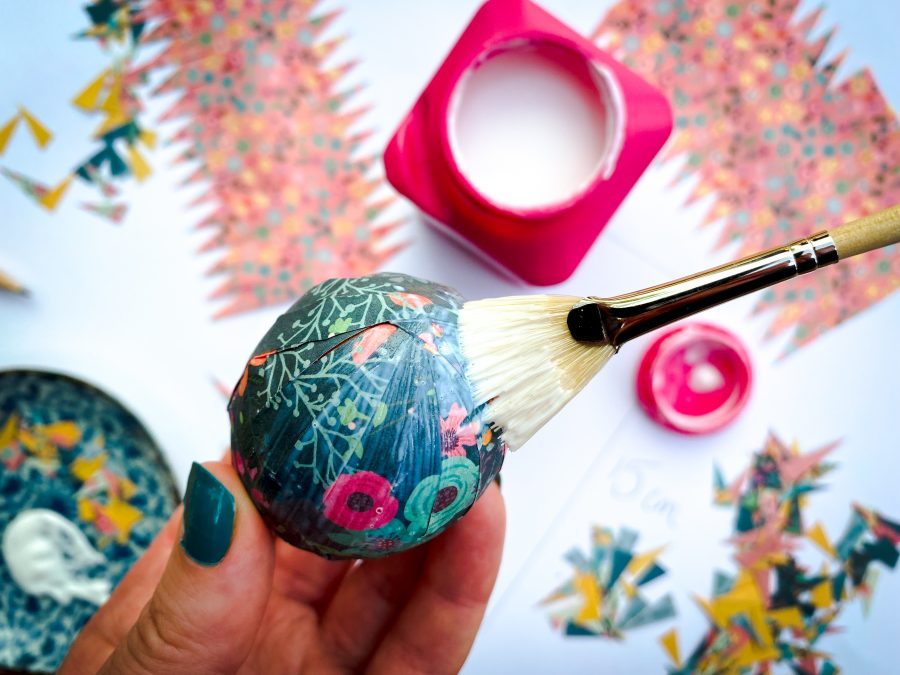
- Holding the bottom of the egg, apply varnish to its top half, making sure that the brush doesn’t scratch the paper pattern. To dry, place it in an egg cup or rest it in a bowl filled with uncooked rice. Finally, repeat this step on the unvarnished half.
TIP: If the wrapping technique looks too tricky, you can simply glue small pieces of patterned paper to the eggs, decoupage-style, or stick strips of adhesive washi tape to them. For a long-lasting finish, varnish the eggs according to step 9.
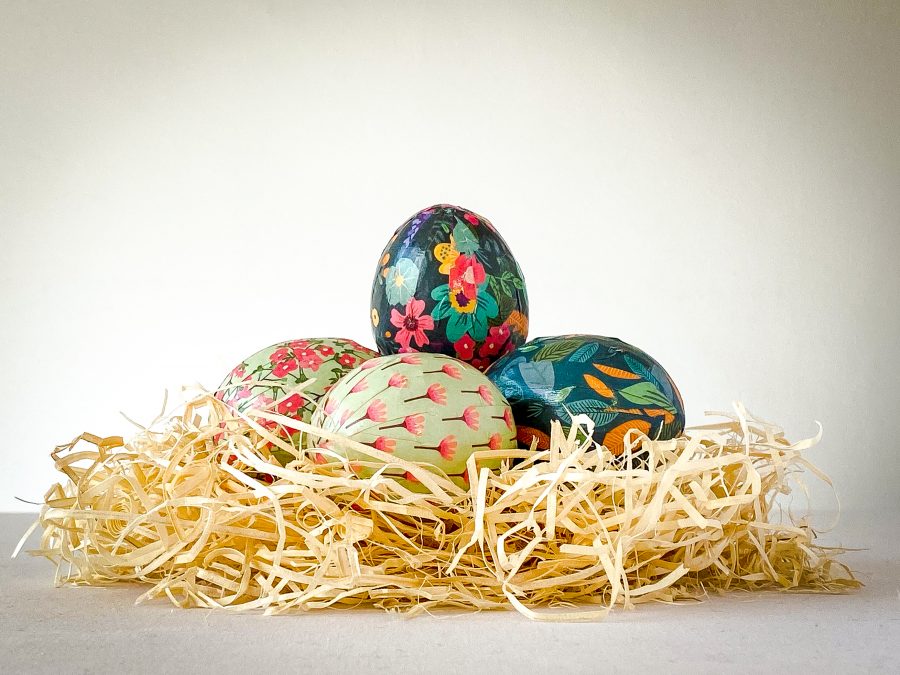
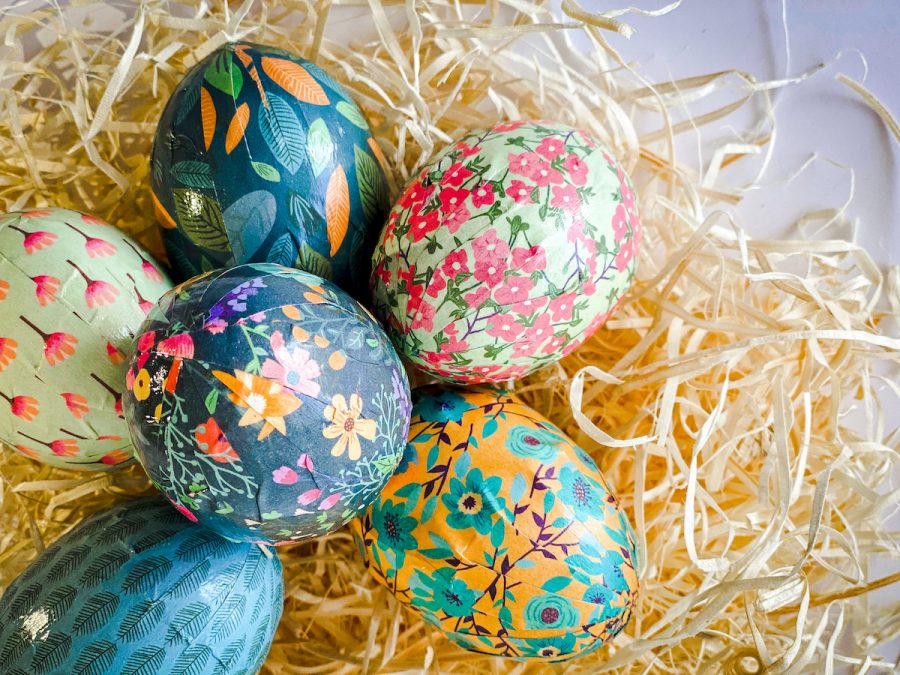
Congratulations, you’ve made washi eggs! Send us a photo to @LexusUK.
All images by Hazel Plush